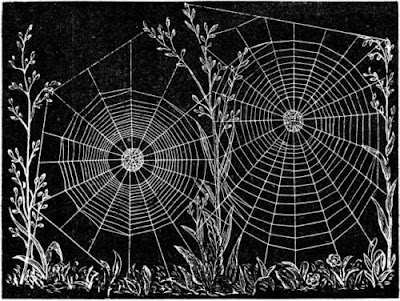
How to build a suspension bridge inspired by spiders
Tension and compression! Spider webs are the inspiration for very strong suspension bridges.
COLLECT
- gumdrops
- toothpicks
- scissors
- small paper cup
- small weight (like pennies)
- 6 large paper clips
- ruler
- masking tape
- dental floss
- straws
- large popsicle stick
A bridge must withstand the compression and tension forces caused by the weight of vehicles and pedestrians. Compression forces occur when instead of pulling, two forces are applied to an object that push and squeeze it. You can see the effects of compression on a pair of old running shoes along the edge of the soles, which look squished and wrinkled due to the compression that occurs over many miles of running.
For bridges and other structures, engineers have incorporated a truss design, or combination of triangles, to create a rigid structure that can distribute the weight across a wider area. Although this is a strong structure, the truss bridge cannot span long distances.
The suspension bridge suspends the roadway by cables, ropes or chains from two tall towers. This is similar to how a spider suspends the web from two branches. The compression caused by the weight of vehicles pushes down on the bridge and then is transferred to the cables. The cables apply a compressive force on the towers that is then applied to the earth. This distribution of weight allows the suspension bridge to support a significant amount of weight over a large distance.
Now it is time to build our own truss and suspension bridges and test their strength!
Experiment
- Gather toothpicks and gumdrops to create your own truss bridge that spans a distance of 12 inches. Remember to incorporate a triangular or criss-cross truss design.
- Make a load tester by unbending a large paper clip into a V-shape. Poke the ends of the paper clip into opposite sides of a paper cup, near the rim. Use a second paper clip to hang the load tester over the bridge deck.
- Place your bridge between two desks that are about 10 inches apart. Attach your load tester to the middle of your bridge. Record how many pennies the paper cup can hold before the bridge fails.
- Now turn your truss bridge into a suspension bridge. Cut two short pieces of straw, each 3 centimeters long. For each tower, tape two straws on either side of a short piece of straw, as shown. Tape the long straws together at the top, too. Repeat 4 times to create 4 towers.
- Tape two towers to the edge of a desk near both sides of your truss bridge. Tape the other two towers to a second desk of the same height near both sides of your truss bridge.
- Attach a Popsicle stick underneath your truss bridge near the middle so that the ends of the Popsicle stick extend out of the bridge.
- Now it is time to create the suspension cables. Using two pieces of dental floss that are each about 5ft long as our cables, pass each end of the cable over a tower, under the popsicle stick, over the other tower, and down the other side. Repeat the process for the second cable.
- To anchor the bridge, wrap each end of the cable around a paper clip. Slide the paper clips away from the tower until the cable pulls tight. Then tape the paper clips firmly to the desks.
- Test again. Record how many pennies the cup holds before the bridge fails.
Reflect
- What parts of the spider web inspired your bridge?
- Why do you think the suspension bridge supports more weight than the truss bridge?
- How would you explain tension to a friend?
- Can you draw a cartoon diagram of the compression and tension forces on your bridges?


No comments:
Post a Comment